Showing posts with label kids crafts. Show all posts

July 16, 2012

DIY Sidewalk Chalk


Here's a quick and easy idea for "bored" kids....DIY sidewalk chalk.


All that you need is cornstarch and water.


I mixed 2 cups of cornstarch with 2 cups of water until I got a thin enough consistency to paint with.
If you don't add enough water, then you'll end up with Oobleck.....


 After I mixed a big bowl of the cornstarch and water, I divided it evenly
and added the food coloring.
My colors are not really bright because I was almost out of food coloring.


 Then, we just grabbed a bunch of brushes and started to decorate the driveway.
It washes off a lot easier than regular sidewalk chalk!


What fun activities have you been doing this summer?


Read more ...

May 7, 2012

Epsom Salt Crystals


I've had the total pleasure of teaching an elementary Chemistry class this year.

Once a week, twenty-two 5th and 6th graders would gather and we would
explore high school level topics with some elementary level fun!

A few weeks ago we studied solutions...saturated, unsaturated and supersaturated.

A fun way to demonstrate this is by making crystals.

Many of the kids had tried making crystals before, but it hadn't worked because
they missed this crucial step.....they did not make a supersaturated solution!


Here's my recipe for awesome crystals! 
(and the ones above are just beginning to grow!)


1/2 cups of water
1/4 cup of Epsom salt


Important....you must heat the water to near boiling or boiling.  More crystals are able to dissolve in the hot water.  You can even add an additional 1/4 cup
of Epsom salts to dissolve if the water is hot.


You will want to stir the water with the Epsom salts until it turns from cloudy
to clear.....this indicates that the salt is being fully dissolved in the water.

We took a pipe cleaner wrapped around a wood split (You can just use a 
pencil)and hung our pipe cleaner over a Styrofoam cup.


Some of the kids made really cool shapes with their pipe cleaners...snowflakes, circles, triangles, and double circles.


Place your cup in a warm, sunny place.  This aids the rate of evaporation of the water.  You want the water to evaporate.


If you notice our cup, it is now half-full of water.  It was 3/4 of the way full when we started.  

Be prepared for NOTHING to happen for up to a week!  We kept coming back and checking
and we had an empty pipe cleaner....but have faith, as the water evaporates, 
the crystals will grow!

I've also heard that you can pour the solution over a sponge and the crystals will grow on the sponge.


I'll keep you posted....we're still hoping for some bigger crystals!

Read more ...

May 1, 2012

Seed Starter Ideas


It has been so cold here to be thinking about seeds...but that's exactly when
you should start planting them indoors....I'm probably 3 weeks late...nothing new!

I originally saw this idea from Carolyn at Homework.  Her pots are SO cute!

I'm more of a burlap girl, so I wrapped my newspaper around a can of beans to 
get the shape and tied them with burlap and string taping the bottoms.


The goal is to make your supplies biodegradable because the pots go right into
the ground.....I can't promise that all my materials are, but I'm pretending they are!
{Please don't leave me mean comments if they aren't...I'll probably take all the 
"cute" stuff off before I put them in the ground!}


I was trying to go for cute with what I had on hand...so I just used a the font "old typewriter" and printed out paper labels.


Here's what I did last year for seed starters....it was also very successful.
I was just too lazy to dig up the baseball card holders!


Are you growing a garden?  I'm determined this year not to kill mine!

Green thumb, I am not!


Read more ...

April 29, 2012

Tea Party Hats {and party pics!}


Confession.....when it comes to crafting, I'm not always very patient!
I'd much rather paint a wall or use a meiter saw.  When it comes to
crafting 9 little tea hats....ugh!

So lest you be fooled by the above photo....here's my version of a high tea hat!


My sweet daughter calls it her "zookeeper" hat!  My mom came over to help, took one look at my version and said..."How about if I take some of this to my house and work on it??"

The wrapping paper idea....a BIG fail!  It just kept crumpling....that, and I needed to buy about 7 more rolls to make 9 hats!

Instead, my mom used white table paper....traced a circle and cut it out. She then used white duct tape to make the hat shape and wrapped it with some pink ribbon.


A MUCH better result.....I am indebted to my mom!


Each little girl got to take home a tea hat and a tissue paper flower...and no,
I can't take credit for those cute cupcakes either....I hired a teenage girl to make them....best decision EVER!


 Thanks to your many suggestions over on my FB page, we had awesome food!

I wrapped deli turkey around string cheese, made PB & J sandwiches in flower shapes, 
finger jello and pretzel sticks in cheese.

My mom made the adorable carrot curls, chocolate-covered strawberries and
chocolate-covered oranges.


Each little girl had the opportunity to "dress-up" in gloves and jewelry..


...and we also had a special time "doing our nails!"


The day was a HUGE success....this group of girls is so sweet...and so quiet
compared to a group of 9 boys!!  I couldn't believe the difference!


Although it was a lot of fun....I think that next time we'll just have a 
picnic and run through the sprinkler party.....and skip the hats!


Read more ...

November 10, 2011

Thanksgiving kid's crafts. . . . .

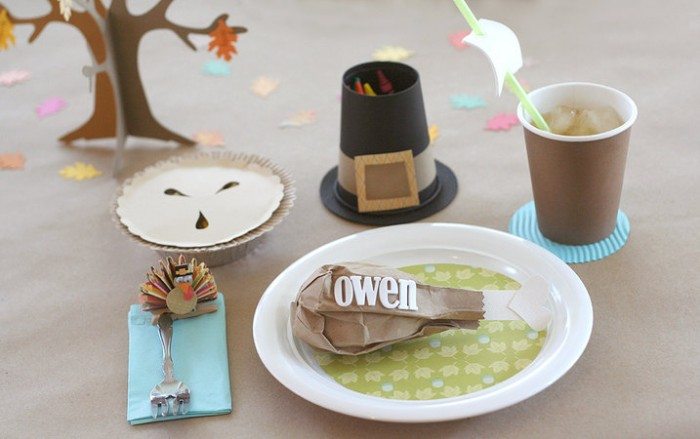
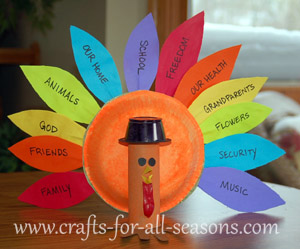
This year it is my turn to "hostess" Thanksgiving and I've been inspired by my friend, Melanie, to make it a kid-friendly, fun-filled day.....so I turned to Pinterest for some creative inspiration.


Here are some of the very fun ideas that I've found so far.....


There are a lot of good ideas on this page!


Someone stop me.....I could just keep going! 

What are your ideas for making this Thanksgiving memorable?

Read more ...

September 14, 2011

Halloween Tic-Tac-Toe....

Thank you all for responding to my plea for guests!  If you are still interested, I am definitely still accepting!  Don't forget that if you are interested in guesting for me, I will need the html code from your posting!!


Our first guest today is from Crafting and Creativity.....a very cute blog!  Just hopped over there and love the Minnie-Mouse hair clip idea!!


-----------------------------------------


Hi, I'm Sarah. I am a 20-something mother 2. And I blog over at Crafting and Creativity.
http://craftingandcreativity.blogspot.com/
Here's an easy little tutorial to make a tic-tac-toe game before Halloween!

You'll need:
  • something to use as your board. (I had this wood piece with sides that one of my son's toys came in and I saved it for something crafty.) You could use a lid from something, or just a flat piece of wood or cardboard.
  • patterned paper
  • white acrylic paint
  • Mod Podge
  • glue stick
  • foam brush(es)
  • scissors/paper cutter/ utility knife
  • paint pen OR permanent maker
  • ruler
  • distressing ink
  • sanding block

I painted the inside and the sides of my wood piece with my white paint. And cut my paper to the size of my wood piece (approximately 5 1/2 inches by 8 1/2 inches).

Using a coat of Mod Podge, I attached my paper to the wood piece.

Then I used my knife to trim off any excess. Then I inked around the edges with my distressing ink. (The colour I used is called "Charcoal Grey")

Then using some scraps in coordinating colours, I cut out 9 squares that were 1 1/2 inches. (4 in one pattern and 5 in the other.)

Using my ruler, I found the centre of the spot where I wanted my game board, then glued the squares down........


Then I added a strip of another coordinating paper to the top:


Wrote "tic-tac-toe" using a marker, then sanded the edges so that the white showed..........


Then I glued that down as well..........


Now for the game pieces! I had these pumpkins that I bought last year at a dollar store. All I had to do was remove the adhesive piece from the back.


For the witch pieces, I used buttons and punched the witch image with a craft punch I had in one of my sets onto the black polka dot paper.............


Then used a round punch for the green cardstock. Next I used Mod Podge to glue 'em all together. And added an extra coat on the top........


If your wood piece had sides like mine, you can just turn your board upside-down and store your pieces like this.....
Otherwise, a small container with a lid works perfectly.


So now you're all ready to play!!


What a great game board for you next family game night!! My 3 year-old son loves playing this game.
Come visit me at Crafting and Creativity & make sure to say "hi"!

---------------------

Thanks so much, Sarah!  Your idea is awesome!

Read more ...
Related Posts Plugin for WordPress, Blogger...