Showing posts with label wreath. Show all posts

October 23, 2012

Inexpensive Fall Wreath Idea


Have you decorated for fall?  

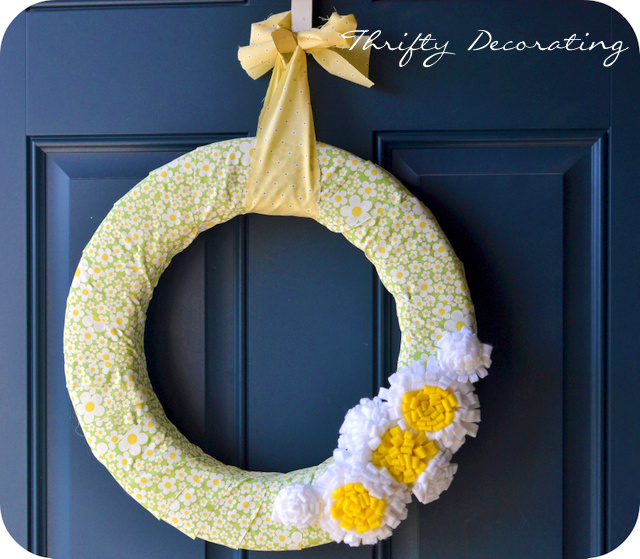
About 2 years ago, I made a wreath using materials from The Dollar Tree
and I am still using it on my front door!


The whole project cost about $3.00!

1 piece of foam board:  $1.00
2 packs of leaves:  2@$1.00


I love the look of a square wreath....it's just unique!


What fall decorations did you recycle this year??


Read more ...

March 4, 2012

Simple Spring Wreath


For the past few years (like seven!), I've hung the same wreath on my door...
it's a gorgeous wreath...forsythia branches twisted into a circle, but this
year I was ready for a little change...

The problem....I didn't want to spend a whole lot of money...

I tried a lot of variations until I ended up with this.....


I had the felt already on hand and followed THIS tutorial to make the flowers.

I also had the fabric and just cut strips and wrapped and glued
it to the wreath form which is the only thing I bought....and I used my 40% off coupon!


This wreath has morphed a few times.  I started with this...


...but I decided that was a little too busy.

If you like that idea, all I did was go into my word processing program,
print out the letters, and cut the triangle shape around it.


So it's one wreath....two different ideas...


Read more ...

February 24, 2012

Sheet Music Wreath


I should have posted this months ago, but, I just forgot!

If you have an empty space on your wall that needs to be filled, you can fill it 
for pennies using a sheet music wreath?  My friend, Jenny, made one for over her fireplace.


Just cut a circle out of a piece of cardboard and start gluing!  HERE is 
a tutorial for how to make it using wire coat hangers!


I'll be picking a winner of the Minky Blankie tonight!!  You still have a 
few hours to leave a comment!

Read more ...

December 3, 2011

Recycle your fall wreath. . . .


Did you make a cornhusk wreath this fall???


Guess what.....you can recycle it into your Christmas wreath with a little bit of spraypaint!!


I took a can of silver spraypaint...glass beads that I found at the bottom of the Christmas bin....and some sprigs of red beads from The Dollar Tree....


....and I realized that I missed a few spots!  You can't see those spots when it's dark....


Can't wait to show you the rest of my Dollar Tree mantle. . . .


Linking with:
The DIY Club
Read more ...

September 5, 2011

Fall Wreath Ideas....

Are you ready to decorate for fall??  I sure am!  My outside plants were fried by the summer heat and are crispy little stalks of brown now.....over the weekend I replaced them with some of the $0.50 quarts of mums from Lowe's!  They are still on sale through today!


My home is also bare because after the 4th of July, I did not feel inspired to do any type of household decorating.....it was just TOO hot!


Here are some ideas to kick-off your fall door decor.....they are in no particular order.


#1.  Corn Husk Wreath from Poppies at Play


#2.  Dollar Store Wreath from Thrifty Decor Chic

#3.  Candy Corn Wreath from The heaps


#4.  Rosette Wreath from Little Things Bring Smiles

#5.  Acorn Wreath from Little Things Bring Smiles


#6.  Burlap Wreath from Craftaholics Anonymous


#7.  Corn Husk Wreath from How Does She
(I made one like this, but I glazed and antiqued my ends to make it look more authentic!)


#8.  Burlap Scrap Wreath from In Between Laundry


#9.  Wheat Wreath from Thrive


#10.  Magnolia Leaf Wreath from Centsational Girl


Edited to add my $3.00 Fall Wreath Idea as #11.....

I've been working on a Fall Pinterest board.....I'll keep adding to it as I find fun ideas!

What are you working on for fall?

Read more ...

August 30, 2011

Old Book Wreath...


I just love the blog {show & tell}......Sasha's style is simple and beautiful.  It was her half bath that inspired me to get into gear and start painting my own!  I plan to totally and completely copy how she updated her bathroom mirrors....it's beautiful!  I'm just saving money to purchase the mdf.....


So when I saw her old book wreath, I knew that I wanted to do that in my bathroom, too!


Here is what I used:


As I was shopping for a book with yellowed pages at the Goodwill, a woman looked over and said..."Oh, I really like that author!"  


To which I replied....."Oh, I'm not going to actually read it, I'm just ripping out the pages for a craft..."


Then, I got the look......the "oh..you're kind've weird" look!


Now....I thought that I double-checked to make sure the book was "clean", but as I was ripping pages out, I realized that I needed to strategically fold......if you get when I'm sayin'!  That's all I need my guests (or sons!) to notice in the bathroom!


I had a bunch of straight pins leftover from another project, so I just used them.....I made a number of circles of pages to give it layers....


I had some old burlap leftover from another project and added a hanger with some hot glue and voila.....a $2.00 addition to my bathroom!  I may still go back and add some distressing ink to the edges to give it some dimension....if I ever have some "extra time."


I just love cheap and easy crafts!

Read more ...

August 20, 2011

Hydrangea Wreath


Today I was browsing Ucreate....one of my favorites sites for creative ideas when I saw this wreath from Viv & Company....


Well....I fell in love with that wreath.  The only problem???  Vanessa admits that the wreath is a little pricey because she uses faux flowers.


But then I remembered that I have some of these in my yard...


So I dove into my craft bin and found this wreath that I made and then hid for St. Patrick's Day.....


Reasons for hiding wreath are obvious....it was UGLY!  Another one of my "oops!" ideas!  So I cut some stems of hydrangea, grabbed my glue gun and started ripping apart the wreath...


Then, I ended up not even gluing the stems.....I just wedged them between the pieces of my wreath and rearranged until it was symmetrical.


And I am loving the result!


Now.....I'm not sure what's going to happen as these dry.  The best hydrangeas that I ever dried were by accident.  I cut them, forgot about them and ended up leaving them for a month or so and they looked great!


I'm hoping that this happens with the wreath.  Viv from The V Spot suggests drying hydrangeas like  this.


Hopefully, a week from now my wreath still looks like this....


I'll let you know....


Update:  I'm updating this to say that it worked!!  The flowers have dried perfectly on my front door and it is as pretty today as the day I first put it together!
Read more ...

July 17, 2011

Tissue Paper Summer Wreath


For those of you who remember my tissue paper Valentine wreath....which traveled around the world on various blogs.....


.....this one is much easier, but it is just as inexpensive!!


My inspiration for this came from MaryJanes and Galoshes, but I started mine with a pizza box from my neighbor's recycling pile.....with permission, of course!


I cut my cardboard into a circle, but now I am regretting that I didn't make a square.....it would have had a lot more original character if I had done a square....guess I need to wait for my neighbors to order more pizza!


I learned how to do these tissue paper pom-poms months ago from Keep It Simple Sister!  I even made some for my daughter's room redo!  I just never thought to make them into a wreath!


For this wreath, I used varying sizes of tissue paper squares.  I didn't measure anything!


You will need to take a stack of 5-10 pieces of tissue paper cut into a square (or you can use napkins!) and fold them like an accordion.

I swiped some of my daughter's pipe cleaners to attach around the center. You can also use floral wire or twisties.


I don't have a picture of it, but I rounded each of my ends to make a semi-circle shape.


Very carefully....pull apart your layers of tissue paper to make a flower.


If you want multi-colored flowers you can cut smaller squares of a coordinating color of tissue paper for the center.


As I was arranging the wreath, I tried to follow the rule of "3's".  I think that everything looks good grouped together in a group of 3.  


I used hot glue to adhere the tissue paper flowers to the cardboard and a ribbon to the back.....and voila!  No one would ever know that it started as a pizza box!


Total cost.....$2.00!!  
I only had to buy the pack of fuchsia and yellow tissue paper!


Enjoy!


I will be partying HERE.

Read more ...
Related Posts Plugin for WordPress, Blogger...