May 31, 2011

Hanging Herb Pots....


{I wish I had a green thumb....}


Recently, we tried growing our own herbs.....we had high hopes for those little herbs!


We followed the directions with the utmost of care.......but we ended up with this....


What happened????  I grew MOLD not plants!!


I had seen this adorable idea at Under the Table and Dreaming and really wanted to try it...


....but because my budget got blown on buying new herbs to replace the ones I couldn't grow, I needed to improvise!  That's when I saw these at our local Gift and Thrift.....


Twenty-five cents for each pot!!  That made me feel better about paying $3.99 a plant for the herbs.....grr!!


Since I no longer had funds to buy cute mugs, I decided that I wanted chalkboard labels, but I am too cheap to order them from someone, so I decided to make my own.


In my word processing program, I made a bunch of different-sized ovals because I wan't sure what size I would need for my pots.


I picked a size and then cut it out......


....then I just traced it on my pot with a black marker.....


Originally I thought that I would tape off each oval.....yeah right!  Do you know how much time that would take???  I just free-handed the chalkboard paint with a tiny brush....it was precise enough for me.


Since I was home alone, drilling a hole through a terracotta pot was beyond my skill level with the drill bit, so I "invented" my own method of hanging the pots......twine looped around the pot!


I tied it through the hole in the bottom of the pot and made a knotted loop to hang the pot from.......(sorry, I just ended my sentence with a preposition.....)


I grabbed my gorgeous...."home-grown-store-purchased" herbs...


......and put it in my painted pots.

I had one of these gold hooks leftover from my Old Window Hairbow Holder....


I just put the hook directly into the wooden overhang of my window and created my own hanging herb garden.....


One quick confession......watering this was a BEAR!!  Dirt kept spilling onto my window sill.....I think you need a spray bottle to water them!  So......I took them down and they are sitting on my sill.....it was a great thought, just TOO messy!


Read more ...

May 30, 2011

Red, White and Blue Crafts


{Patriotic Crafting....}

Well....I was too busy finishing our homeschooling year and mowing grass to make any cool crafts for Memorial Day.  I had really wanted our deck to be "decked" out for our picnic today, but with the temps soaring into the 90's...I'm focusing more on creating shade!


Since I missed crafting for Memorial Day, here are some projects that I am going to try and make for the 4th of July!


I have some old pallet wood that I really want to turn into this from The Creative Crate:


Stacy made another awesome flag from an old window, too!


I also really want to make some of these home-made blue mason jars from Bridal Buzz....


Once I turn them blue, i want to make them into these jar candle-holders from Maryann at Domestically Speaking....


And that will keep me so busy that I will have to use my go-to box cake recipe for Black Forest cake!


How are you celebrating Memorial Day?


Read more ...

May 28, 2011

Winner of the Apron....

Sparklinbecks picked the winner of this vintage apron last night......


I'm a little behind because we had a wedding this morning and I'm just now getting on the computer......


Congratulations, Kelli Fisk!  You can send me an email and I'll 
get you in contact with Rebecca!!

Read more ...

May 27, 2011

Memorial Day Dessert


{Black Forest Cake}


I'm not a baker.....I'm just not......I have great family "genes" for baking, but they stopped...with me. I think that it has to do with the fact that I just don't measure exactly.....not even close!

So this cake is easy.....based on a box mix....you don't measure, just toss your ingredients into a bowl! And it's red....hence the Memorial Day tie-in!


Here's what you need:


Ingredients:

1 cake mix, anything darkish chocolate
2 eggs
2 cans cherry pie filling
1/4 cup mayonnaise
1 tsp almond extract (I never add this because I never have it!)
1 tsp. vanilla
1 package chocolate chips
1 tub whipped topping
chocolate candy bar

The mayo was my most recent addition.....I just wanted to add the extra calories!  (joking!)


To your darkish cake mix, add 1 can of the cherry pie filling, 2 eggs, mayonnaise, almond and vanilla extract..


Beat your mixture on medium speed until your cherries are adequately crushed and tortured....


Stir in your chocolate chips by hand because you don't want anything to destroy their chocolate-y goodness.....


Be sure to grease and flour your pans!  Bake 40-45 minutes at 350 degrees.  Allow to completely cool!


Now, you can substitute real hand-whipped cream for this next step and boost your calorie count to the thousands, or you can be lazy like me and use a tub of low or no fat whipped topping.....


Spread on your whipped topping like icing and then spread your second can of cherries on top of the whipped topping.


Grab the Hershey bar that's been sitting in your fridge since Halloween....well, maybe Christmas.....and grab your potato peeler......grate little flecks off to make your topping all fancy.....like you slaved all day in the kitchen making this designer dessert!


And there you have it.....a red and white (no blue!) dessert that you can make by throwing the ingredients in a bowl!!

Have a great Memorial Day Weekend!


Places I party....

Read more ...

May 26, 2011

PB Knock-off Clock


{A $2.00 piece of wall art....}


I've had this project sitting forever!  I started it back before I had a blog....and I just finished it this week!


Since I was never planning on "posting" about it, I didn't take pictures of the original steps.  Here's my best attempt to recreate.....


I was originally inspired by Alchemy Junk and her version....she gives a great tutorial for how to make the wood look old!

I started with an old piece of plywood.....we use it every year to put our Christmas Tree stand on it....guess, I'll need to get something new for next year!


I painted my wood with a white base....I then tried to age mine by mixing multiple acrylic paint colors or red, yellow and brown.  I never quite did achieve the rust color that I was going for.....


I didn't really have to "age" my piece of wood too much.....it was already pretty beat up.  I just tried to make the holes look "rusty."  I also went over it with glaze to "age" it.

You can see in this next picture all the colors that I added when painting.....I just kept layering....if something looked too dark, I would take a wet paper towel and smear it around....


I used the glaze to draw my circle....I first drew it with a pencil and had to erase multiple times...and yes, I did try the whole thumbtack/string idea...I don't know what the problem was! (It's probably that whole exact measurement thing...)


As I have mentioned before, I have no type of fancy cutting machine.....I only had a printer that was running out of ink!


I picked the Times New Roman font because it had the word "roman" in it and I figured, hey...."roman numerals!"  I printed it out...holding my breath that it would do all the numbers before running out of ink!


I used black acrylic paint to paint on the numbers and then took sand paper and roughed them up.....


And yes....I know that the numbers are wrong......all the numbers are supposed to face in toward the middle......the hubby didn't like it like that!  It's all about compromise....sigh!


Cost: 
Wood:  free, an old junked piece
Glaze:  free, had it
Paint: $2.00 for 2 bottles of acrylic paint in red and yellow
Total:  $2.00!!


Now I'm on the look-out for some rusty clock parts!

PLACES I PARTY....
Read more ...

May 25, 2011

Thrifty Thursday #11


{Thrifty Thursdays #11}

Once again...your talent just blew me away this week on Thrifty Thursday!  I had SO much fun looking through this week's projects! 

Each week you all find creative ways to make big changes on a thrifty budget!!


I love how Big Lives turned this rather ugly lamp...


Into this gorgeous custom light that matches her bedding...


Isn't that a gorgeous re-fashioning!!  It doesn't even look like the same light!


Stacy at Conspicuous Style created this stunningly gorgeous wall!!


Truly....it's just breathtaking!  If I only had enough continuous wall space to do that!!


Do you see that beautiful fabric on the chair??  Painted....with a stencil!! 


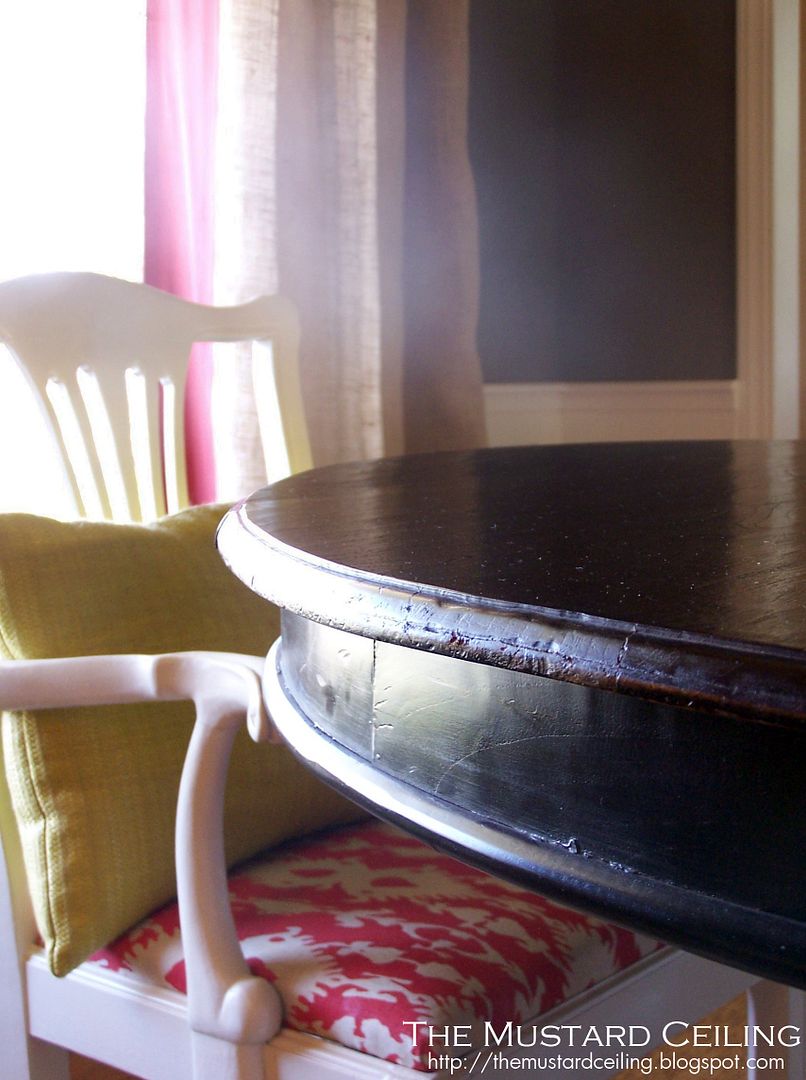
The Mustard Ceiling made this beautiful Ikat Fabric design with a stencil sheet and Simply Screen paint......such an elegant transformation.


By now you all know how much I LOVE beadboard wallpaper!! Look what Harbour Breeze did with her kitchen.

Before:


After:


Calmingly beautiful!!  Beadboard wallpaper is such an inexpensive way to make BIG changes!


Finally, I just love how Bella Storia made this plate rack from melamine plates!!


It just looks expensive and it's even safe to hold food because they are just plates from Target!!


If you were featured this week, be sure to grab a button from the sidebar!


And so begins week #11 at Thrifty Thursdays!


Here are some very simple suggestions for the link-up:
1. Please become a follower of Thrifty Decorating.
2. Be sure to link to your POST and not your blog.
3. Please copy and paste my link button somewhere in your post
or blog so that others can link back.
4. Share some comment love....We all love to get them!!


Also....once you've linked at Thrifty Thursday, you can go over to link up with Thrifty Thursday at
 Saved by Love Creations!


Read more ...
Related Posts Plugin for WordPress, Blogger...